Overview
JavaFX 8 is the newest Java framework for creating rich multi-platform desktop applications that it ships out of the box with the standard edition JRE. The framework has been developed by learning from the mistakes of the previous such libraries (AWT, Swing, and the first JavaFX). The only downside is that it requires Java 8 and above to run.
This post will be about how to setup an IntelliJ IDEA project for a complex application with JavaFX 8 the way it should be done.
Prerequisites
To start the project we should download and install the following programs:
- IntelliJ Community or Ultimate edition – download
- Java Development Toolkit 8 – download
- JavaFX Scene Builder 2.0 – download
Create the project
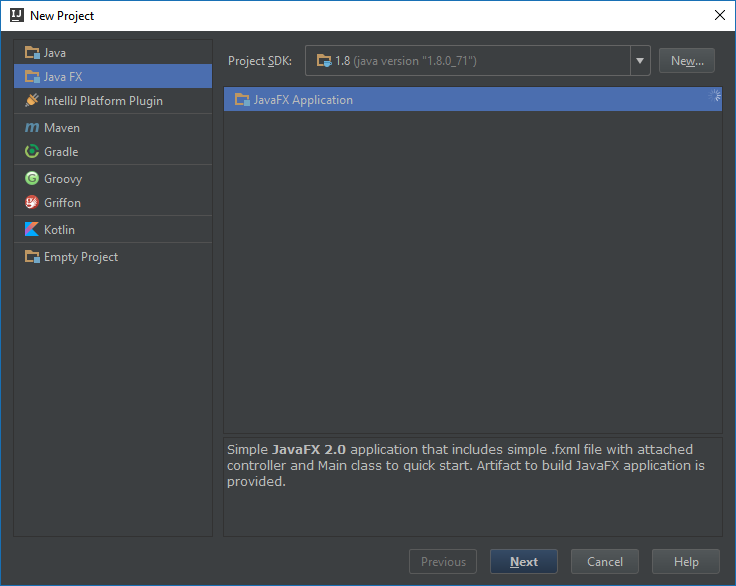
- Start up IntelliJ and start a new project using File > New > Project:
- Name your project as you’d like and it should look similar to this:
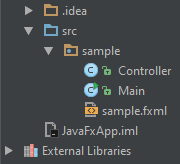
This is all good for a small app. We get a sample organization of our files but for a large project this structure will not do.
Improve the project
To scale up we need to create well defined packages for our separate class-types. The controllers, models and views. By design JavaFX is MVC (Model-View-Controller) oriented and we should leverage that fact by exploiting the built-in mechanisms for organizing the code.
So before we start with coding we should:
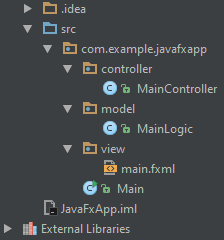
- Add our default package name for the sake of the example that would be “com.example.javafxapp”
- Create 3 more sub-packages “controller”, “model” and “view”.
- Leave the Main file on the top-level
- Move the Controller class to the “controller” package
- Rename and move the FXML view file to the “view” package
In the end the result should look like this:
Setup Scene Builder with IntelliJ
One of the best ways to develop the UI for the JavaFX application is to use the WYSIWYG (What You See Is What You Get) tool named Scene Builder. IntelliJ lets you run it from the context menu of your view files to save time. The first time you need to tell IntelliJ where to look for the installed Scene Builder executable:


Where to go from here
Now that you have the advanced project setup in place you can start using Scene Builder to create your initial user interface and add programmatic behaviour to it via the controller classes. Don’t forget to externalize your application logic to the model classes so that they are unit testable without depending on UI code.
A great article on how to start with Scene Builder (albeit using Eclipse instead of IntelliJ) is posted here, so be sure to check it out as well.
Thank you for reading!
